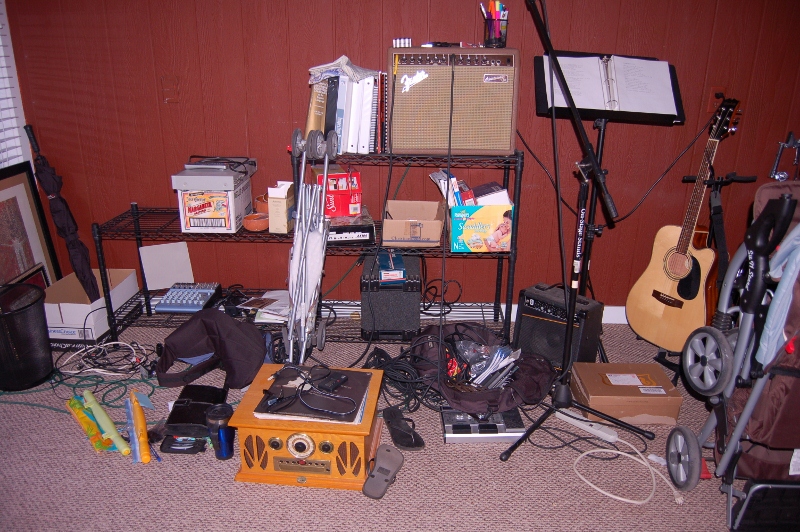
Okay, I want to preface this post with two important things to remember...maybe three things.
1. This room is far from what I would consider "done." There are still a lot of goals on my to-do list, which I'll explain as I go, but for now, just know that these pics represent progress.
2. This is a shared space. This room not only houses all of my craft stuff, but it's also Dave's music room and surf storage space. In designing the layout of this room, we have to consider all three functions (and hopefully end up with a space that we also like to sit in and enjoy our morning coffee).
3. Okay, there might not be a number 3. I just wanted to make sure all my bases are covered before we get this party started.
Before I show you where we're currently at, let me remind you of what this room looked like last month:
Pretty awful.
Then we painted:
And I painted some laminate cabinets and set them up on the east wall (the wall without windows). The left cabinet is Dave's and is nearly empty. As time goes on, he'll probably be putting music equipment inside; things like his music books could find a nice home here. The right cabinet is mine, and I've got present wrapping supplies, camera equipment and old photo albums stored, among other things.
After setting up the cabinets, we took a minor two week-ish break, and one night (sort of on a whim), we decided it was time to continue the transformation. This was mostly spurred on by Dave's guitars. They had been sitting on guitar stands in one corner of the room, and Daniel loved to sneak in here when no one was watching and "play" them. A two year old with a guitar on a stand usually only ends one way; luckily, I was able to catch him before the guitar took more than one or two spills, but something needed to change. Fast.
So, Dave headed over to a music store here in town, came back with some wall mounts, and now we have this:
After we set up the guitars, we went ahead and moved my craft table into the room and, as you can see, it sits just underneath. One of my not-too-out-of-reach goals is to add some shelves onto the wall adjacent to the guitar wall so that I gain even more storage for craft items -- especially those things that are not child-safe (scissors, anyone?).
You may also be eyeing a conspicuous, super ugly piece of office furniture which is my craft chair. This is the sister chair to this beauty, sitting at the kitchen table:
I have similar plans to reupholster the remaining chair the same way, different fabric. This was a super easy project, and I have no idea why I haven't done it, yet.
Okay, let me back up a little. This is the view of our sunroom as you walk in. I took this picture while standing in the laundry room, just off the kitchen. Just beyond the sunroom is our swimming pool.
You'll notice that our large wing back chair has made a move (it used to be in our living room -- more on that in an upcoming post, promise). You're also looking at a few more random pieces of furniture -- our old coffee table, a dining chair, and a cute little teal-y green chair. I love the little green chair. It's actually an antique folding chair. My mom rescued it from a literal dumpster and had it refinished with new fabric. She said that when she pulled it out, it was all faded with rusty hinges and looked pretty bad... but look at it now! She gave it to me for my birthday this year. I'm not sure where it's final home will be, but for now, it's keeping company with the other random, mismatched furniture.
I'd love to turn this into a finished corner with furniture which looks like it was meant to be there, but this is the stuff I had sitting around the house. This will have to do until more cohesive furniture becomes the priority. Right now, it's pretty low on the list.
Also in this corner is Dave's music set up -- two large speakers, his amp, a microphone, and some sort of control panel. Don't ask me to be more specific...I don't know exactly what all of his equipment does, but I do know that it does something and that it needs to be a part of the set-up. And Dave has been awesome about making it as neat as possible. If you're into playing music at all (or know someone who is), you know that it's just messy. There are cords everywhere. It's not exactly aesthetically pleasing. But Dave has hidden a lot of that pretty well, I think.
Here's a shot from a slightly different angle. The picture above the doorway is a photograph I took in Virginia on a trip there years ago. I need to get this framed and to find a more permanent home for it, but for now, I enjoy seeing it every time I look into this room.
Okay, moving on. If you walk into the room, and turn back around to your left, you'll see my art shelf. A friend of ours actually built this shelf a little while ago, then moved into a smaller place. So we're storing it for him and his wife until they get back into a larger place again. It makes for pretty great storage, though. It's ginormous, and almost all of my stuff fits on this thing.
From the top down (not including the record player on top), I've got: 1) odds and ends, mostly things that I don't want to put on a lower shelf to keep things child friendly-ish. A basket of notions, another basket of yarn, cards I've made, paintbrushes, pin cushion, etc. 2) bins with various supplies, including paint, markers, crafty things for my kids, and various adhesives and Mod Podge. 3) my sewing machine (I know, I need to get a cover for it), spools of thread, a box of tools (scissors, glue gun, etc.) and my craft paper supply. 4) my fabric. 5) paper scraps in the wine box and more crafty supplies in the green metal box. Oh, and a couple of records.
My organization may not make a whole lot of sense to others, but I know where everything is and it doesn't look half bad, either. These are the important things, right?
The opposite corner, diagonally, is where we'll be storing Dave's surfboards and leashes. Dave has plans to build a simple storage rack for these guys. They'll eventually stand vertically, probably next to the blue cabinets to get them away from a window (and the sun). But for now, they're doing all right leaning against the window, blinds closed. We've also got a few pieces of music gear over here which we'll need to figure out how to store.
And that's it -- you guys are now officially up to date on our sunroom progress. I really love the changes this room has seen in the last month. I think my very favorite part is being able to open the doors to the laundry room and into the sunroon (there are two) to let the light come through. It really does brighten up the kitchen with those doors open, and it doesn't look like a dungeon back there, anymore. It's actually given me the itch to transform the laundry room into a space I love as well. Right now, the laundry room a very boring utilitarian space with so-so appliances and little to no shelving. And, until recently, no natural light. Hmmm....
Thanks for reading!
Sarah
Showing posts with label house. Show all posts
Tuesday, April 24, 2012
Friday, April 6, 2012
The Master Bedroom -- Gulp
So, I can hardly believe that I'm posting these pictures on the internet. Most of the time, when people post strange pictures design-wise, it comes with a giant "before" stamped somewhere on the picture. I'd love to say that these are before pics, but since I don't really have any after pics (and no major plans to make an after happen anytime soon), I feel that that would be dishonest. No, people, this is just my bedroom.
It's not that there aren't some little plans in the works. This is why I'm writing this post, as a matter of fact. I'll get to that part later. But, largely, what you'll see here is what we'll be living with for awhile. Sigh.
So. The Master Bedroom. This is one gigantic room, with one gigantic bathroom to the left as you walk in. I don't really have any bathroom pics for you today, but I took all of these pictures while standing in the doorway to the bathroom.
This is our bed. This bed is part of the suite that my husband bought 10 years ago (used). If you look carefully, you'll see that the headboard completely matches the laminate cabinets that I painted here. Imagine those cabinets on either side of this bed. Do you see why I had to get them out of here? Even if I don't do anything further to this room, the fact that they're gone just makes me so supremely happy.
I'm not the biggest fan of the headboard. It's not that it couldn't be doctored up into something cool, it's just that it's not something I would have chosen. It does have hidden storage, though, so from that end it's super practical. And Dave loves all things practical... in other words, he doesn't want to get rid of this headboard. So...
...one of the small-ish plans that I'm going to be tackling within the next week or so is adding some upholstery to it and painting the sides and top a creamy white. I bought some fabric at Jo Ann's (30% off) the other day and when I came home I threw it up there just to see how it might look.
I wanted something with a subtle pattern and something that would tie into the bedspread. I love this bedspread, by the way. It counters the other crazy colors in the room. For some strange reason, we painted the walls yellow with an orange accent wall. I loved it for about a week. Then I realized that it was a little bit garish. Then I realized it was a lot garish. But we probably won't be repainting them anytime soon, unless I do it myself. And since I won't be climbing any ladders in my 3rd trimester (and likely won't feel like messing with it when attending to a newborn), this is what we have to work with. And I do think these colors could work... if the furniture were different and if we didn't have green carpet on the floors. All in good time. That's our motto around here.
After putting the fabric up, I got kind of antsy to fix some other problems in the room. The problems being the amount of stuff that we had just thrown into corners (I've spared you some before pics of this situation, but trust me, it wasn't pretty). Oh, and I decided that the time had come to give us some side tables. So I transferred these little guys into the bedroom. They were in the entryway before.
Then I decided that I was done with the flower picture above my headboard. This was the picture that inspired the whole color scheme on the walls, by the way. Turns out I love it in small doses and not so much in large doses. I moved the picture and put those black and white numbers there in its place. Those may be completely temporary. Mostly, they're just there as a placeholder until I find something that I truly love.
But I still really like the flower picture. I bought this for $5 at a yard sale a couple years ago, and I have no intention of getting rid of it. So I moved it over by the window. I like it over there much better. So much happier to look at. Oh, and yes, I know I have no curtains (the blinds are pulled up to let in light). Adding some real window treatments is one of the small-ish things I'd like to do in the near future.
Here's a wider shot of that side of the room. Again, please ignore the curtain on the door. Real window treatments are coming. This side of the room was a complete mess right before I took this photo. It was impossible to see where the wall met the floor. I spent about an hour and a half cleaning it up. The boxes that you see beside the bed are destined for out attic; they just haven't made it up there, yet. I'd love to add some seating to this are at some point... maybe a little table. But for now, I like the openness of having all that stuff that we've been storing cleared out.
I dislike this bookshelf. But we do have a lot of books and we do need to put them somewhere. I'd love to get a different shelf which adds some interest to the room. I'm currently looking on Craigslist for that, so if I find one, I'll post some update pics. For now, though, I arranged the books in a way that pleases me, so this isn't such an eyesore anymore.
So that's it. My master bedroom. Thanks for taking a minute to check things out. Stay tuned for some of those changes!
Thanks for reading!
Sarah
It's not that there aren't some little plans in the works. This is why I'm writing this post, as a matter of fact. I'll get to that part later. But, largely, what you'll see here is what we'll be living with for awhile. Sigh.
So. The Master Bedroom. This is one gigantic room, with one gigantic bathroom to the left as you walk in. I don't really have any bathroom pics for you today, but I took all of these pictures while standing in the doorway to the bathroom.
This is our bed. This bed is part of the suite that my husband bought 10 years ago (used). If you look carefully, you'll see that the headboard completely matches the laminate cabinets that I painted here. Imagine those cabinets on either side of this bed. Do you see why I had to get them out of here? Even if I don't do anything further to this room, the fact that they're gone just makes me so supremely happy.
I'm not the biggest fan of the headboard. It's not that it couldn't be doctored up into something cool, it's just that it's not something I would have chosen. It does have hidden storage, though, so from that end it's super practical. And Dave loves all things practical... in other words, he doesn't want to get rid of this headboard. So...
...one of the small-ish plans that I'm going to be tackling within the next week or so is adding some upholstery to it and painting the sides and top a creamy white. I bought some fabric at Jo Ann's (30% off) the other day and when I came home I threw it up there just to see how it might look.
I wanted something with a subtle pattern and something that would tie into the bedspread. I love this bedspread, by the way. It counters the other crazy colors in the room. For some strange reason, we painted the walls yellow with an orange accent wall. I loved it for about a week. Then I realized that it was a little bit garish. Then I realized it was a lot garish. But we probably won't be repainting them anytime soon, unless I do it myself. And since I won't be climbing any ladders in my 3rd trimester (and likely won't feel like messing with it when attending to a newborn), this is what we have to work with. And I do think these colors could work... if the furniture were different and if we didn't have green carpet on the floors. All in good time. That's our motto around here.
After putting the fabric up, I got kind of antsy to fix some other problems in the room. The problems being the amount of stuff that we had just thrown into corners (I've spared you some before pics of this situation, but trust me, it wasn't pretty). Oh, and I decided that the time had come to give us some side tables. So I transferred these little guys into the bedroom. They were in the entryway before.
Then I decided that I was done with the flower picture above my headboard. This was the picture that inspired the whole color scheme on the walls, by the way. Turns out I love it in small doses and not so much in large doses. I moved the picture and put those black and white numbers there in its place. Those may be completely temporary. Mostly, they're just there as a placeholder until I find something that I truly love.
But I still really like the flower picture. I bought this for $5 at a yard sale a couple years ago, and I have no intention of getting rid of it. So I moved it over by the window. I like it over there much better. So much happier to look at. Oh, and yes, I know I have no curtains (the blinds are pulled up to let in light). Adding some real window treatments is one of the small-ish things I'd like to do in the near future.
Here's a wider shot of that side of the room. Again, please ignore the curtain on the door. Real window treatments are coming. This side of the room was a complete mess right before I took this photo. It was impossible to see where the wall met the floor. I spent about an hour and a half cleaning it up. The boxes that you see beside the bed are destined for out attic; they just haven't made it up there, yet. I'd love to add some seating to this are at some point... maybe a little table. But for now, I like the openness of having all that stuff that we've been storing cleared out.
I dislike this bookshelf. But we do have a lot of books and we do need to put them somewhere. I'd love to get a different shelf which adds some interest to the room. I'm currently looking on Craigslist for that, so if I find one, I'll post some update pics. For now, though, I arranged the books in a way that pleases me, so this isn't such an eyesore anymore.
So that's it. My master bedroom. Thanks for taking a minute to check things out. Stay tuned for some of those changes!
Thanks for reading!
Sarah
Friday, March 30, 2012
Things Are Looking Up
While I was cleaning out those laminate cabinets that I painted last week, I got lost in all of my past. Do you ever do that? I start going through things, then suddenly it turns into a trip down memory lane. As in, "Oh! Look at all those 4th graders that I taught right after I graduated college! ...dude, they'd be seniors in high school by now... gulp."
Anyway, one of the things I found during this lengthy process was a folder of old pictures that I've taken. Back in 2004 or 2005, I was given my very first digital camera. It was a little point and shoot, and I had a ton of fun with it. The camera only had 4 megapixels, but that wasn't half bad at the time. I took many pictures, and most of them were developed and promptly stored away in this little folder.
Within the stack of pictures that I found were several outdoor shots, primarily in yellows and greens. And then the light bulb went off. I could totally put these humble pictures to work in my kitchen -- where I'm looking to add more yellows and greens. I liked them well enough to display them. So, I slapped them in cheapie photo frames and did.
Here's what I found. These were all taken in Jacksonville, FL, unless otherwise noted.
I love the yellows in this one:
This picture is my personal favorite:
And this one was taken in Saint Augustine, FL:
Not bad for free art, right? These pictures were hung on this odd little piece of wall that connects the top cabinets to the ceiling, which is one of the few actual wall spaces that we have in the kitchen. I've left it fairly empty for far too long, mostly because I had nothing that I wanted to hang so high. It almost seemed a bit pointless, since you really do have to look up to see anything up there. This isn't the best pic of this space, but it gives you an idea of what I'm talking about:
Pretty empty... and unexciting. Here's what we've got with the pictures in place:
So, here's my vision. As I mentioned briefly in a previous post, we're gearing up to paint the cabinets white. I also want to ditch the garland above the sink and add hooks for holding mugs... and maybe some sort of a kitchen sign. We'd love new floors and countertops, but those will have to wait. Shoot, we'd love to get rid of this wall entirely and open things up between the kitchen and living room, but hey, all in good time. For now, my main goal is to brighten up this space and make it more cohesive with yellows and greens as accent colors.
What do you think?
Linking up to these great parties here!
Thanks for reading!
Sarah
Anyway, one of the things I found during this lengthy process was a folder of old pictures that I've taken. Back in 2004 or 2005, I was given my very first digital camera. It was a little point and shoot, and I had a ton of fun with it. The camera only had 4 megapixels, but that wasn't half bad at the time. I took many pictures, and most of them were developed and promptly stored away in this little folder.
Within the stack of pictures that I found were several outdoor shots, primarily in yellows and greens. And then the light bulb went off. I could totally put these humble pictures to work in my kitchen -- where I'm looking to add more yellows and greens. I liked them well enough to display them. So, I slapped them in cheapie photo frames and did.
Here's what I found. These were all taken in Jacksonville, FL, unless otherwise noted.
I love the yellows in this one:
This picture is my personal favorite:
Not bad for free art, right? These pictures were hung on this odd little piece of wall that connects the top cabinets to the ceiling, which is one of the few actual wall spaces that we have in the kitchen. I've left it fairly empty for far too long, mostly because I had nothing that I wanted to hang so high. It almost seemed a bit pointless, since you really do have to look up to see anything up there. This isn't the best pic of this space, but it gives you an idea of what I'm talking about:
Pretty empty... and unexciting. Here's what we've got with the pictures in place:
So, here's my vision. As I mentioned briefly in a previous post, we're gearing up to paint the cabinets white. I also want to ditch the garland above the sink and add hooks for holding mugs... and maybe some sort of a kitchen sign. We'd love new floors and countertops, but those will have to wait. Shoot, we'd love to get rid of this wall entirely and open things up between the kitchen and living room, but hey, all in good time. For now, my main goal is to brighten up this space and make it more cohesive with yellows and greens as accent colors.
What do you think?
Linking up to these great parties here!
Thanks for reading!
Sarah
Friday, March 23, 2012
Busy, Busy Week
I know I've been a little MIA this week, but I have a good excuse. Dave and I really opened a can of worms last Friday when we decided to paint the sunroom. We had been talking about this eventuality for some time now, but decided -- sort of on a whim -- to get on it last weekend.
I love this little creamer. It's terribly retro with those little mushrooms (which I actually adore), and it totally fills the yellow and lime green requirement. And at 59 cents...
I liked this lime green bowl, too. Simple and perfect for adding a little color to a shelf.
Then I saw this candlestick holder. Not really my style as is, but with a coat of yellow paint, it might also be a worthwhile investment.
So, that's what I did...
While I was at it, I decided to spray paint the lids for my mason jars.
Do you remember this corner shelf?
I was getting so tired of looking at those tins. I was really into that style years ago, but my tastes have kind of changed. So I traded them out. You'll also get a glimpse of my new yellow lids at the bottom of this picture. I'm kind of digging those, too.
Then I made a few changes to the shelf by my window. From this:
To this:
I took the photo of the leaf years ago, found it recently, and stuck it up there. I also moved the yellow cups to the corner shelf above and added the (now yellow) candlestick holder. I love that photo series of my family taken last summer at a wedding. Really need to get that framed before it gets ruined....
So, that's it! Just a few small and very simple changes to bring some things together, but sometimes little things make a big difference.
What little projects have you guys been up to lately?
Thanks for reading!
Sarah
Then I decided to move some ugly laminate furniture out of my bedroom and into the sunroom to add storage and then I decided that I should paint them, too. Long story short? I have been painting for nearly a week straight, and I am tired. Seriously. But I can't wait to show you guys the results. I'm pretty excited about what I'm seeing take shape.
Sadly, I'm not done. I still have to second coat the cabinets today, so maybe by tomorrow I can give you guys the reveal.
But, I do have something to share. This is a quick little spray painting project that I completed last weekend.
Back story: Yesterday was my birthday, and what I wanted more than anything else was to paint my kitchen cabinets white. But we have neither the time nor the money to do this right now. So, we decided to save up to pay a friend to come help us out (this is the same guy who painted the exterior of our house last year. He's a professional painter and quite good -- and could always use a little more business). This will take a few months of good paychecks, but at least we're on the right track.
Anyway, I decided recently that I'd like to pull my kitchen together with an accent color (or colors) to play off the white so that it feels more cohesive and less busy. And I chose yellow and lime green. So off I went to Goodwill last weekend to see what I might find there. And this is what I came home with:
I love this little creamer. It's terribly retro with those little mushrooms (which I actually adore), and it totally fills the yellow and lime green requirement. And at 59 cents...
I liked this lime green bowl, too. Simple and perfect for adding a little color to a shelf.
Then I saw this candlestick holder. Not really my style as is, but with a coat of yellow paint, it might also be a worthwhile investment.
So, that's what I did...
While I was at it, I decided to spray paint the lids for my mason jars.
Do you remember this corner shelf?
I was getting so tired of looking at those tins. I was really into that style years ago, but my tastes have kind of changed. So I traded them out. You'll also get a glimpse of my new yellow lids at the bottom of this picture. I'm kind of digging those, too.
Then I made a few changes to the shelf by my window. From this:
To this:
I took the photo of the leaf years ago, found it recently, and stuck it up there. I also moved the yellow cups to the corner shelf above and added the (now yellow) candlestick holder. I love that photo series of my family taken last summer at a wedding. Really need to get that framed before it gets ruined....
So, that's it! Just a few small and very simple changes to bring some things together, but sometimes little things make a big difference.
What little projects have you guys been up to lately?
Thanks for reading!
Sarah
Monday, March 19, 2012
Sunroom Redo, Part 1 -- Painting
If anyone ever doubted the power of paint, these pictures would have to convince them that, yes, a couple gallons of primer and paint could transform a room. I mean transform, in every sense of that word.
The sunroom has been the black sheep of our house since...well, since forever. It has served as bedroom a couple of different times, and it's also been our office slash craft and music room. But for the last 6 months or so, it's been storage, nothing more. And we've kept the door tightly closed so that we can forget about it.
Why? What could be so horrible? Well, my friends, I give you this:
You can see that this room has not only red walls, but a red ceiling as well. It was a very, very red room. Not at all a place for relaxing. This color, by the way, used to cover the entire exterior of our house until last year when we had it repainted. Not only that, but we also had some sky blue trim kickin'. It was enough to make your eyes hurt. Thankfully, that's a thing of the past. And now, so is this red room.
Here we go. The sunroom is situated behind our laundry room, which is off the kitchen. It was actually an outdoor patio, and the previous owners had it enclosed. Because of this, it almost doesn't seem like it's a real part of the house -- it feels very disconnected. Through this mini-renovation, I hope to sort of bring this room into the house a little bit more, to make it more a real part of our living space.
The picture above is what you see when you walk into the room. Here are some other angles. This is looking back toward the door that leads into the room.
Our wall of windows -- which I absolutely love.
The wall opposite the windows. Yikes.
Dave really likes playing guitar and he really likes to surf. We're going to have incorporate both of these hobbies into the room, along with all my craft stuff. I also want to add some seating in one corner so that we can just be in the room to enjoy the light.
The door leading out the to pool deck. In this picture, we've started to clear out the room a bit.
Ahh, the wall is empty. Deep breath.
All that stuff has to go somewhere. For now, the laundry room, but don't worry, I have a plan.
Cutting in! I get so excited at the beginning of a project!
Woops. Our first painting accident. Natalie didn't seem to mind until the 5th washing of her hair.
Back in the sunroom, in diapers and undies, the kids "helped" paint the room. Daniel:
And Natalie:
I can't tell you how pleased I was the first time I saw this as I rounded the corner into the kitchen:
I knew painting the ceiling would make a huge difference, but I was blown away anyway.
This is just the color-blocking primer. Such an improvement already!
Our sunroom has real wood paneling since it started off as more of an outdoor space. Painting in between the panels of the wood was kind of a nightmare and took a long time.
It was dark by the time we finished. Therefore, my after pics don't show the result in the best light. I'll be posting some better pics in the future as this transformation continues. But for now, this is looking back toward the door leading into the laundry room and the kitchen.
The wall of windows:
And for fun, I brought in a little foot stool to see what that might look like against the new color.
I think it looks pretty good! It's so nice to look through the doorway from the kitchen and see this room. I love the view past the grey walls and into the pool deck. Really, we've only started this room, but it's already come a long way.
Thanks for reading!
Sarah
Subscribe to:
Posts (Atom)


.jpg)


.jpg)


.jpg)


.jpg)
.jpg)
.jpg)
.jpg)
.jpg)
.jpg)
.jpg)

.jpg)
.jpg)
.jpg)