Monday, February 27, 2012

Fabric Tulip Wall Art - Tutorial

This past weekend my husband and I got a little crazy and decided to get both of the kiddos new, big kid beds.  At first, we were just thinking Natalie needed a new bed, but then we began to think about how Daniel has been trying to climb over his crib rails lately -- something Natalie never did.  So we decided to go for it and get them both set up in toddler beds.  

We went for a quick search on Craigslist, and, within about three hours, secured both beds last Friday.  The next day, we ran around town picking them up, taking apart the cribs, saving one for new baby number 3 and dropping the other one off at my cousin's house (her daughter is also about to have a baby).  Whew.  It was a busy day.

We also made a stop at Target and bought new bedding.  We made a really big deal out of the new bedding purchase and I think the the kiddos were both really excited.  The end result is two, very cute and very small toddler beds, and two very cute and very excited toddlers.  They love them!  And, fingers crossed, so far it hasn't been a difficult transition at all.  We were expecting all kinds of misbehavior -- jumping around in rooms, sleeping on the floor...you name it.  But, for the last few days anyway, they've both found their sleep pretty quickly, and in their beds.  We'll see how things go once they get more used to not having rails around them.

Anyway, to make a much longer story short, I decided that they both needed some new art on their walls.  The toddler beds are pretty small, and they leave some giant empty spots above the beds that need to be filled.  I found a cool project on The Delectable Home that uses a bird as the subject matter for some easy fabric art.  Although I love birds, I wanted to do something a bit different for Natalie's room.  I ended up deciding to do some sort of flower design.

First, I gathered my fabric.  I just used up some scraps of fabric from past projects, so this was F-R-E-E!  You may notice in this picture that I also have one piece of an embroidery hoop.  I've had this for years...and I have no idea where its mate is at, so I've never done anything with it.  I decided to try to use the leftover piece for this project.
   

The next step was to trace a circle on the background fabric a little larger than the embroidery hoop and cut it out:


Then I began hot gluing the fabric to the hoop.  If you are using the whole hoop (both pieces), you could skip this step and just put the fabric inside the hoop the normal way.

Oh, and I did these next few steps on my kids' drawing mat to save my dining room table; thus, you'll see some crayon scribbles underneath.  Sorry about that!


So far, so good!  Time to add the flowers.


I free-handed a couple of tulips on my contrasting fabric and cut them out.  After arranging them on the background fabric, I then began to hot glue them on.  I love hot glue.  I use it for just about anything.


After staring at my finished piece for awhile, I decided that I chose two fabrics that weren't contrast-y enough.


The flowers just didn't pop like I wanted them to...they needed something. So...


I began to sew an outline.  This was purely decorative, and if I had known I would end up doing this step, I might have skipped the hot glue.  But, I will say that having them all hot glued on did make the sewing easier.  They didn't move at all and really, this went pretty quickly.

Finally, I was able to hang my art:


I like it!  I think the flowers look kind of nice against the yellow walls and also with the patchwork curtain I made for Nat Nat a couple of years ago.  I do think this space needs something more, though.  But I work slowly.  I like to let it evolve over time.

Here's a shot with the curtain closed so that you can get a feel for all the colors in this room.


And a close-up of the finished piece:


I think the girl approves!


Total cost for this project: nothing --yay!
Total time for this project: about three hours.

Next up: Daniel's room.  Poor thing.  His walls are kind of bare right now.  Good thing he really doesn't care.  This is more for me, anyway ;)

Thanks for reading!
Sarah

Thursday, February 23, 2012

Busy Bags

Do any of you use Busy Bags with your kids?  Last October I hosted a Busy Bag swap after reading so much about them on the internet.  Basically, I asked a bunch of friends if they'd be interested in participating and about 15 of them were.  So we each made 15 of the same activity and put each one in a gallon-sized baggie.  At the swap, we (you guessed it) traded them out.  It felt a lot like Valentine's Day -- everyone had a grocery bag and we just set them up and went around the room, giving one of our homemade Busy Bags to each person.  At the end, we each had 15 different games or activities to take home with us.  It was a lot of fun!

Anyway, I have to confess, I've been keeping the Busy Bags in my bedroom, out of the way, so that the kids don't make a giant mess with them.  But recently I realized that I only take them out every once in awhile and that kind of defeats the purpose of having them.  Also, this week I reorganized our playroom, so I decided it was time for the Busy Bags to make an official appearance.  Out they came.

I cleaned the box that they were in and slapped on a label.  Then I made a little spot for them on the bookshelf in our playroom:

  
The verdict?  Success!  They both love them, but I think Natalie especially likes having access to them (a lot of the activities are a little too old for Daniel, I think).  They'll just pull the box out a little bit, dig through the bags, find one that they like, and take the activity to the table to work on it.  It's kind of fun.  Makes me feel like I teach preschool again.

Today, I snapped a few pictures of Natalie working on a counting activity:


The activity was very simple, and took her all of five minutes to finish it.  There are five cups, each with a numeral (1-5) written on it, along with the corresponding number of dots.  Also in the bag were a couple of handfuls of dry pasta (some were dyed with food coloring).  Natalie's job was to count out enough pasta pieces to put the correct amount in each cup.

The activity works well because it's so simple that she can almost do it by herself and it doesn't take long to complete.  If it was more complex, she definitely would have lost focus before finishing.  As you can see, she was pretty into it.


The activity also had a little makeshift fishing rod.  I wasn't terribly sure what to do with that... maybe the kid is supposed to grab a piece of pasta with that instead of using their hands?  That seemed way too hard for me, so I tossed it aside and just let Nat Nat use her hands.


Yay for Nat Nat!  She did it :)


The Busy Bags seem to be so popular around here that I'm thinking about adding in some more.  Most of the ones that we have right now focus on math and readiness skills (colors, shapes, etc.).  I don't think any of them teach letter recognition.  Natalie knows all of her letters, but she's still learning to recognize the lower case alphabet, and Daniel still needs to learn most of his.  So I'm going to work on some sort of activity that would let them work on letters... I'll post when I come up with something.

Thanks for reading!
Sarah

Just Found a Really Cool Blog

Called Simple Mom.

I haven't explored all of it yet, but I've already found something that I want to participate in: Project Simplify.  I tackled some of the hot spots that she's set up for us this year a couple weeks ago (find that post here), but that won't stop me from working on the rest of them!  I would encourage all of you to go check out the blog and get in on the action, too.  Should be a lot of fun!

Thanks for reading!
Sarah

Tuesday, February 21, 2012

My Nat Nat is THREE!

I cannot believe how time goes.  It seems like yesterday that we were holding our little baby girl in the hospital, completely worn out and sore from head to toe... well, I was sore, anyway.  But that wasn't yesterday.  That was three years ago.  And now, here we are, with a little boy as well and another one on the way.  Life is so different from then.  All you have to do it wait and life happens.

I'm kind of emotional.  Maybe it's because I'm pregnant?  That's the excuse I'm going with.

Anyway, this is going to be a picture-heavy post.  I tried not to add in a zillion pictures from different angles of the same thing, but instead to give you a whole picture of my little girl's day.

First, I wanted to start a new tradition this year.  I found this over at Young House Love and I really loved the idea -- even the part where you take the picture by the front door.  So I made the sign the night before Natalie's birthday and then on the big day, out we went to take the picture.  I love it!

 
So, we devised this plan for waking Natalie the night before: Dave would run to get doughnuts in the morning and then we would walk into Natalie's room singing happy birthday, carrying a doughnut with a lit candle.

We woke Daniel up first so that he could be a part of the festivities.  He wanted nothing to do with it.  He's a boy who likes routine and did not understand why he wasn't immediately sitting on the couch with his morning milk.

 
Once we calmed him down (sort of), Dave carried Daniel and the dougnut, Grandma (Dave's mother) carried the first present, and I carried the camera down the hallway into Natalie's room.  Dave and I hung streamers right before this so that the hallway would look festive when Natalie came out.


Success!


Yes, I know my child is three and that she's still in a crib, and yes we're planning on getting her into a big girl bed soon.  We haven't felt the need to rush it because she hasn't tried crawling out...but I know it's time.

She was so excited!


One more:


Then we set them both down at the table with their breakfast of champions...doughnuts.  Special days require special treats, I think.

I made another sign to greet Nat Nat as she sat down to the table.


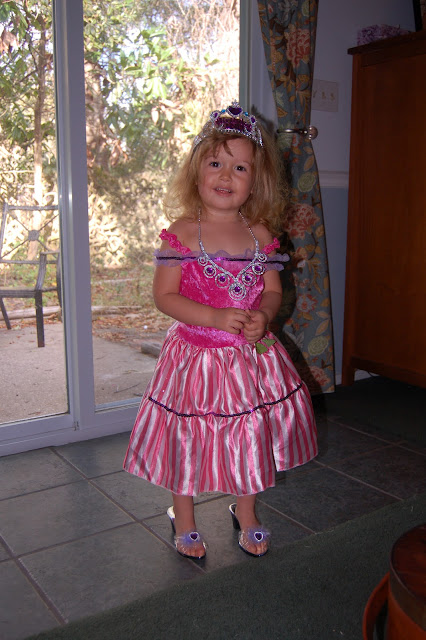
After breakfast, she immediately wanted to put on the princess dress she opened in bed.  I think she liked it:


Later in the morning, Dave and I had to leave the kiddos with Grandma.  I had a meeting at my church and Dave went to pick up a (F-R-E-E!) play set from a friend who wanted it out of his backyard ASAP!  It nearly killed him, though.  It's one of those giant wooden ones and Dave had to take it apart piece by piece because the guy had a fence around his backyard with one very small opening.  It took over three hours for him to take it apart and haul it (in two trips) back to our house.

During this time, Grandma made the birthday cake with two very enthusiastic helpers.  Well, as I understand it, Natalie was pretty enthusiastic and Daniel lost interest partway through.  But they both loved the end:


We frosted and decorated the cake during their nap.  I really like how it turned out!


After nap, Dave took Natalie on a special Daddy-daughter date to Dairy Queen to get her an ice cream cone.  He said she was very methodical about eating it and that he had to stop her several times from taking a big bite out of the bottom too soon.  He didn't bring the camera with him, so we didn't get any pictures. :(  However, in honor of that time, I'll give you this (and also because I love this picture):


Around 5:30, some family came over for a little birthday celebration.  We ordered pizza (Nat Nat's request) and made a fire outside.  After dinner, we did cake and ice cream:


and opened the bounty.  Seriously.  That girl has a lot of stuff.  She got another princess dress from her Aunt Nay from the movie Tangled.  This might be her favorite movie ever.

The gloves were a little bit too big:


So were the shoes.  But, boy, were they cute!


By this time, she was just humoring us.  We took so many pictures you'd think we were about to send her off to the prom.


Oh, and Gray Gray and Papa bought Daniel a little brother present.  Woohoo!  A new hat!


It's a little big, but that's just room to grow as far as I'm concerned.  Now maybe we can retire the cowboy hat since every time he wears it, it leaves a dark red crease on his forehead -- it's a little too small for him.

Well, that was Nat Nat's day.  I think she had a lot of fun, which was the goal.  Yay for birthdays!  :)

Thanks for reading!
Sarah

Saturday, February 18, 2012

Quick Pillow Update (and other news)

I wanted to write a quick post to show you the update I made to our couch yesterday.  Last summer (or spring) I discovered the joys of pillow cover-making.  Once I learned the super simple-no-zipper technique to make a pillow cover I whipped up five of them in record time.  I put a few of them in the kids playroom and a couple on our front porch.  I haven't made much since, though, until yesterday.

Awhile back, my friend gave me an oversized pillow form and it's been sitting around our house for months, waiting for a little love.  Finally, finally, I hauled the kiddos down to Jo Ann fabrics (has anyone else noticed how their selection of fabric has gotten soooo much better over the last few years?) and we chose a fabric for our pillow.

I won't bore you with the details on how to make a cover using this technique -- there are dozens of excellent tutorials online -- but I will tell you that it is very easy.  And quick.  I made this guy in under an hour, during nap time, including measuring and cutting the fabric.

So, here's a before pic:
   

I really like all the pillows that are on the couch still, but I'm a little bored with them.  Ready to add in something new.  I wanted something kind of spring-ish, something with some color, and something that would blend nicely with what's already there.  Nat Nat helped me choose the fabric.  Sort of.  She really wanted a purple one, but mama won out.

Here's what we came up with:


Let's get a little closer:


 I really like the pattern and I love the colors: light blue, light green, and grey.  It really does make a big change -- adding in some much needed color and light.

In other news, we were supposed to be celebrating Nat Nat's birthday today, but my little Daniel came down with a 102 fever yesterday and was diagnosed with a sinus infection.  :(  I feel sad for both of my little guys.  Daniel really is a little sickie, and Natalie was so looking forward to her birthday party.  She's okay with the idea of postponing for a couple weeks, I think, but it still makes me sad.  We'll do a smaller, family only thing on Monday, her actual birthday.  I'll post pictures.

But, here they were yesterday, before Daniel showed any symptoms of getting sick.  I rearranged the furniture in the playroom the other day and moved their art table to the middle of the room.  Now it's much more user-friendly; they can both actually get to it pretty easily.  And what makes me even happier is that they are both now really using it!  Yay -- success!


Do you see the shelf in the background, to the right in the picture?  It's empty now, but my plan is to turn it into a craft-supply shelf, with supplies that are safe for them to get to, only (crayons, paper, stickers -- that sort of thing).  I also want to add some sort of a chore chart because we think that Natalie is getting old enough to do some simple chores around the house now that she's 3.  We bought her a piggy bank for her birthday, and we're also going to start teaching her some simple money concepts.  Long story short, I'm kind of excited about this area and I have some plans mind, so I'll keep you guys posted about how it all goes down.

Thanks for reading!
Sarah

Wednesday, February 15, 2012

My Sweet Valentine

So, yesterday, Valentine's Day, I didn't expect us to do a whole lot.  Dave was on late shift at work, which meant that he wouldn't get off until 8:00 that evening.  My mom, who has been staying with us for part of the week, offered to watch the kiddos (or stay home with them) after we put them to bed (bedtime is at 8:00) so that we could go out for coffee and dessert, and that is what we planned to do (and did do -- which was pretty nice, too).

Dave left early for work, about 45 minutes early.  This didn't cause any alarms to go off, though, because on late shift days, he's often anxious to get in a little early to get started.  So I was very surprised when he walked back in the front door half an hour later and told me to come out on the front porch so that I could see my present.  Yay!   I love surprises!

Here is what I found:


An orange tree!  I am so excited!  We talked about getting an orange tree a few weeks ago to plant in the side of our yard (the sunniest spot) but hadn't gotten one yet.    

Nat Nat keeps coming out on the porch and checking it for oranges; she doesn't quite understand that it's going to take at least a couple of years before we start to get them.  She reminds me of Toad from the Frog and Toad stories.  In the story where Frog gives him some seeds, Toad wants them to grow immediately, so he shouts at them and then decides he's scaring them.  Then he takes a different approach and starts to read to them and keep them company at night.  Anyway.... I love the Frog and Toad stories.  And I love my valentine.  :)

And, for fun, a little but of randomness:

Watching the TV after bath time is serious business around our house.  It's their only TV time during the day, and it's very important to them.  Note the cowboy hat.  And Nat Nat's sunglasses.


Natalie put this puzzle together the other day (with a little bit of help) and she was so proud... and so was I.


Daniel wanted a picture with the puzzle, too.


I've said it before, and I'll say it again: I love her smile.


So, that's been our life that last few days.  What's been going on with you guys!

Thanks for reading!
Sarah

Monday, February 13, 2012

New TV and Media Console -- Progress!

Hey everyone!  I have some update pics for you today -- yay!  One quick word before I go any further, though.  This is not how things are going to look in the end.  I've got a list of small goals for this little corner of my home to bring everything together at the end, but for now, let the excitement begin!

Before I give you some after pics, let me remind you what this space looked like just a few days ago:


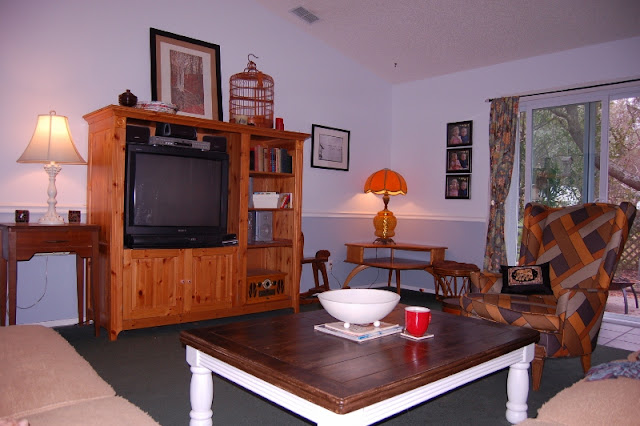
Here's a straight on shot of the whole she-bang.  The sewing table to the left of the console was in the living room before (as was the lamp).  I moved the little chest from my bedroom into the living room on a whim to try to add symmetry and balance to the space.  Wasn't sure how it was going to work out, but I really like it.  It's much smaller (shorter) than the sewing table, but the lamp on top of it is much taller than the other lamp, so I think it works.  

I love these two lamps.  I bought the white one at Goodwill a year or two ago.  It was spray painted a metallic silver and I just repainted it white.  The other lamp (minus the shade) was given to me when a family member passed away.  He was an antiques dealer.  It was a sad way to acquire it, but I do love the lamp.  A friend of mine gave me the shade several months later and I think they look awesome together.  

I'm realizing now that the TV looks a little crooked...one of the reasons that I'd like to eventually mount this on the wall.


A close-up shot of the TV and console...


Another close-up, with a view into the entryway.  Just wanted to demonstrate how much more open everything is without that giant, bulky entertainment center taking up so much space (and light).


A detailed shot of our distressed wood top.  I love the variation in texture due to the staining process.  I also love how the orange glow from the lamp to the right plays off the color.


Immediate(ish) goals for this wall include:

1. Remove the black and white photos to the right and left of the console.
2.  Figure out some sort of artwork to hang above (or around?) the TV.
3.  Possibly mount the TV on the wall; not too high, though.  We don't want to have to look up at it.
4.  Add baskets in the cubby holes of the console.  I've been on the lookout for some sort of fabric box, but most of the versions I've seen are either a boring beige color or come in patterns that are just not my style.  I'm trying not to be too impatient about this step.  I want just the right thing.
5.  Once baskets are in place, I want to move the cords and plugs into one of the cubbies (which will then be hidden inside a basket).  Right now, they're just bunched up behind the TV because there's no place else for them to go and it looks a little chaotic back there.

After that, I guess we'll just let the area evolve.  But for now, I'm just so happy to stand back and love the difference.

Thanks for reading!
Sarah

Sunday, February 12, 2012

The Kitchen Curtains are D-O-N-E!

Yay!  I really like how they turned out, but, man, this project was so much more frustrating than it ought to have been.  But before I get ahead of myself, how about a before pic?


Again, I liked the original curtains well enough to keep them hanging around (get it?  ha ha ha) for a couple of years.  But I was getting a little bored with them.  So my plan was to dye them.  If you'd like to see that post, you can find it here.

I dyed them grey, and I'm pretty happy with those results.  The next step was to add some sort of design.  I wanted to do an impressionist flower thing, and this is what I came up with:


I cut all the shapes freehand and pinned them on the curtains.  I sort of eyeballed the distances between each flower and the edges of the curtains.  I didn't want anything to be too exact.

The next step was to sew them on.  At first I was going to hand sew it, but decided that was incredibly impractical since I have a sewing machine and it would take a fraction of the time to use the machine.

But my self-taught sewing skills really caught up with me during this project.  I wanted to use a zigzag stitch for the flower stems, and I'm really just learning as I go here.  I knew enough to reduce the tension...but I sort of figured that that was all there was to it.  I must be wrong, though.  It just kept jamming and tangling up on me.  I wanted to throw my machine across the room more than once.  But somehow, we -- my machine and I -- got threw it.

For the actual flower buds, I used a straight stitch and that was much easier.  Aahh, good old basic sewing.  I just turned the curtains in circles as I stitched each bud to achieve a crazy, not-too-calculated circle pattern.

I'm sorry I don't have any pics of the sewing.  I was too busy silently cursing my machine to think about the camera.

But I do have a lot of after pics!  So, without further ado:

Here's a close-up of the flower pattern.  My almost-three-year-old decided that they were lollipops when she saw them.  I think I'm okay with that. :)

  
This is a full picture of the whole dining nook.  My Dave made this table for me as a Christmas present one year, and I love it.  I scored the wooden chair for $20 at a boutique here at the beach because one of the slats on the back is broken.  Dave got the other chair from his office for free about 10 years ago when they were updating all their furniture.  It had awful, ratty grey upholstery, so I cleaned up the rust and reupholstered it awhile back.  I made the picture board a few years ago and I update it with family photos every few months.


This is a shot of the other side of the nook.  I love this floating shelf from Target and I'd like to add another one.


This picture is probably the most true-to-life as far as the color of the curtains.  


And, just for fun, this is the corner of my kitchen.  On the shelf I've got a four picture series of our family from last summer at a friend's wedding.  It's not framed right now...one of these days I'll get around to framing and hanging it.  I also have this awesome mug that I found at a yard sale -- it's a piece of pottery that was thrown on a wheel, but it looks as if it got squished.  I call it my accident mug.  I've also got some milk glass (faux, maybe) that I found at another yard sale; yellow mugs from Goodwill; and a small pestle that I bought in the Dominican Republic years ago.  

I made the stuffed birds and sewed and hot glued them to a branch that I found in my yard.  I love them.  I know that bids are a little overdone, but I can't bring myself to take them down.  Dave thinks the two in the middle look like they're staring intently into a pot of soup.  I like that :)  


Well, that's it!  If you're reading this and you have mad sewing skills and know exactly what went wrong with my project, I'd love your advice.  I have a slip cover that I'm in the middle of and I can't bring myself to finish it just yet.  I need a little break from sewing before I dive right into the sewing machine again (with a project that promises to be just a little more difficult than this one). 

Thanks for reading!
Sarah