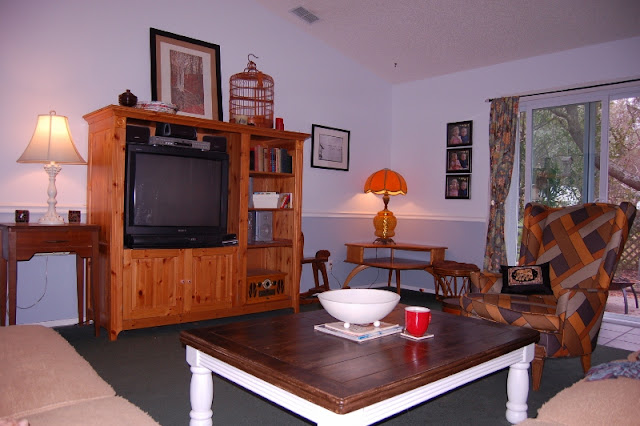
So, Dave and I decided that it was time to buy the flat screen. You read that right -- we've never had one. Right now, this is what our living room looks like:
Our old school entertainment center rises like a beacon and sits like a tumor, covering almost an entire wall and completely sucking up any natural light that we might get in our cave-ish living room.
So, to properly welcome our new TV, we bought this off of Craisglist:
But it was a bit plain and boring, so we decided to remake the top. I found an awesome tutorial over at Young House Love about distressing new boards. I've been drooling over the 12 foot console they made for months, so I suggested that we use that as inspiration to make one of our own.
First, Dave cut the boards roughly to size.
After cutting them, he screwed them in place on the table. He placed the screws randomly, 2 or 3 on each board. Once they were all screwed in, Dave made one clean cut with his saw so that they were all the right size. Then we took them off again.
We had an awesome time distressing them. We used a lot of the techniques in the YHL tutorial -- including banging the boards with a hammer and a bag of screws. We also used various instruments to make other marks. Dave made some deep grooves that followed the grain of the wood, and I thought this looked especially authentic in the end. My favorite tool for distressing turned out to be a crowbar -- I think, mostly, because it just made me feel powerful.
Then I stained them. Before staining the actual boards, I did a few test runs on scrap wood. We tried a few different stains including gunstock, warm chestnut, and ebony. The gunstock turned out to be waaay too orange. We bought the ebony for this project but I didn't realized that ebony meant really black, not just blackish, and I didn't want a black and white piece. We went with the warm chestnut, and used ebony as a second layer to darken a couple of the boards. Since we were going for a distressed look, we didn't mind that the stain was uneven -- darker in some places and lighter in others, so we only applied one coat.
One of the reasons we screwed the boards in before staining was so that I could also stain the holes that the screws left behind. Again, because we wanted them to look used and distressed, we didn't bother to putty the holes that the screws left behind.
Here's a close-up of the boards to show you some of the marks that we made. Most of the deep holes that you see here were made with the crowbar.
While the stain was drying, Dave sanded down the top of the table in four strips so that we could not only nail the boards in place, but also apply wood glue.
Once they were ready, Dave re-screwed the boards back on the table (applying the glue first) to steady them as he nailed them into place. Once they were all nailed down, he took the screws out for the last time. We decided to keep the nails totally visible because we liked the look.
Finally, he put the edge on. These were smaller boards that we stained in the same way as the top pieces. We only put edging on the front and the two sides and didn't bother with the back.
Once all the building was done, we gave it three coats of polyurethane, lightly sanding between each coat. The whole thing took about a day, not including dry time. Man, I think it looks pretty nice. Mmmm.... What do you think?
The sad thing is that, even though it's completely finished, we can't use it. We haven't bought our new TV yet. We were all ready to go, but then we got this awesome-town coupon in the mail -- a $100 rebate for the exact TV that we were planning to get. I'm incredibly impatient, but I can't argue with that. So, we're waiting until February 13th. Which also means that I don't yet have any final pics to post...but as soon as we see it, you will, too.
Thanks for reading!
Sarah

.jpg)
.jpg)
.jpg)
.jpg)
.jpg)
.jpg)
.jpg)
.jpg)
No comments:
Post a Comment
I truly love reading your comments!